
Note. All of the below-mentioned are written based on my real exam registration process.
Exam registration is done through the web page Pearson VUE and therefore, you must sign up for this site firstly:
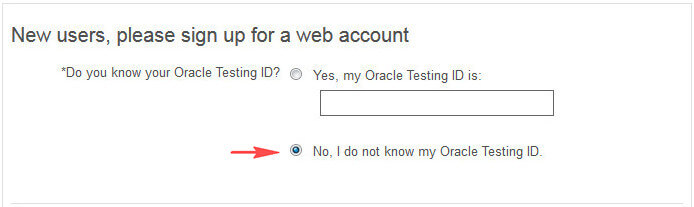
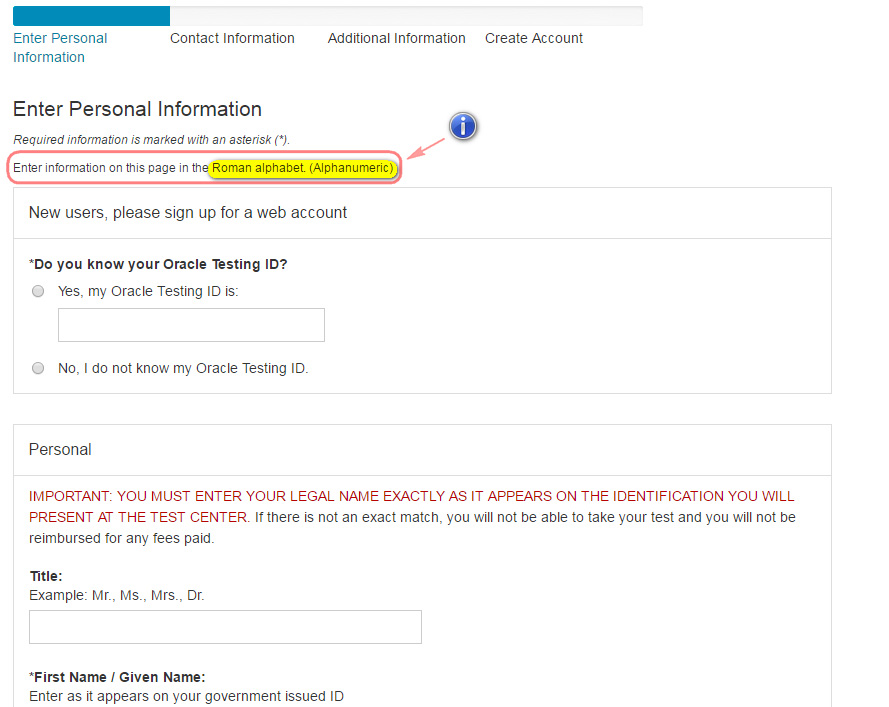
When you click on the “Create account” button, the registration form opens and then you are asked to enter your “Oracle Testing ID”. If you are taking an exam for the first time, then choose option 2.
You must write your name and surname as appears on your ID card (use English letters). When you arrive at the exam center on the exam day, your name and surname that you specify when registering will be checked with your ID card. In order to avoid any problems, it is recommended that you correctly write your name and surname in English.
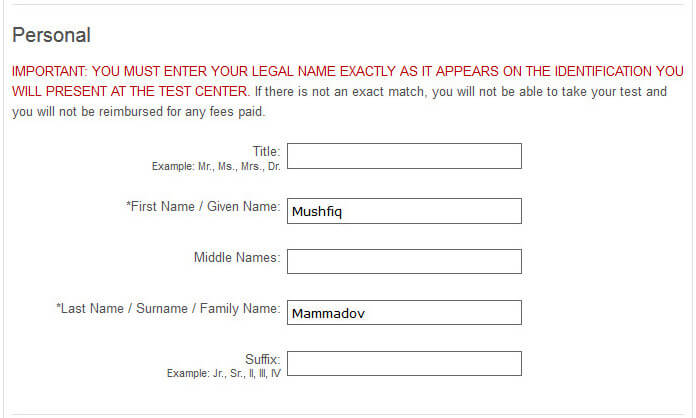
Additionally, the name and surname that you provide here will be written on the certificate. Following this, enter your active email address and press “next” (make sure that you write it correctly).
In the next window, enter your contact information. After that, press the “next” button to go to “Additional Information” window and in here, answer “no” to the asked question and press “next” button again to finish the registration process. The following notification will appear on the screen:
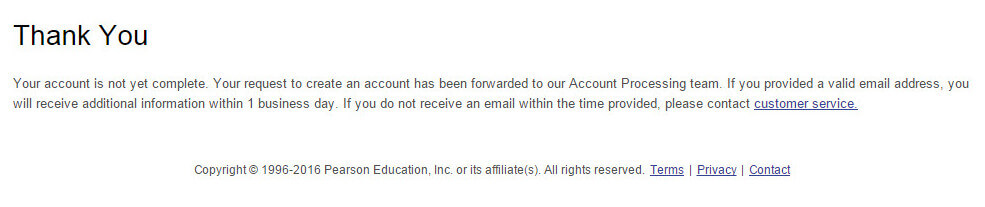
After a few minutes, your username and password will be sent to your email address. Now you can sign in to your account:

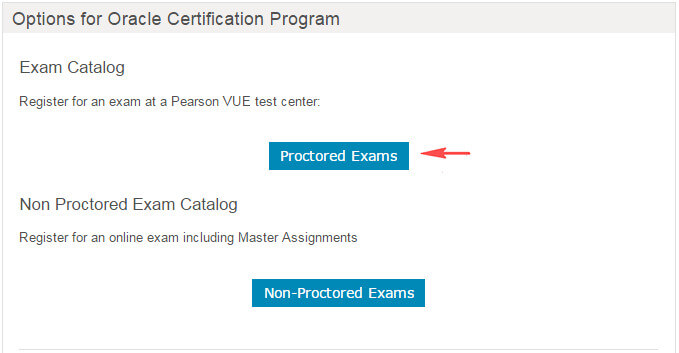
You can register for the exam. Let’s continue with the following steps. Firstly, press “Proctored Exams” button on the main page:
In the opened page, press the “Certification Exams” button:
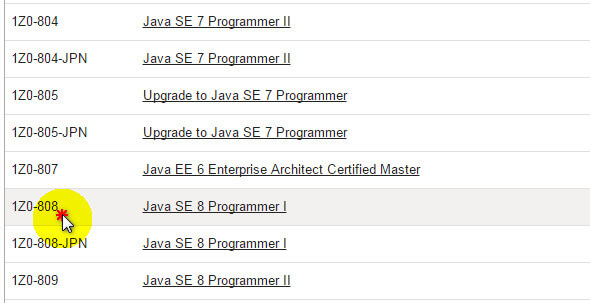
 After this, a list of all exams is displayed and we can select the exam that we need from this list:
After selecting the exam, the following page is opened:
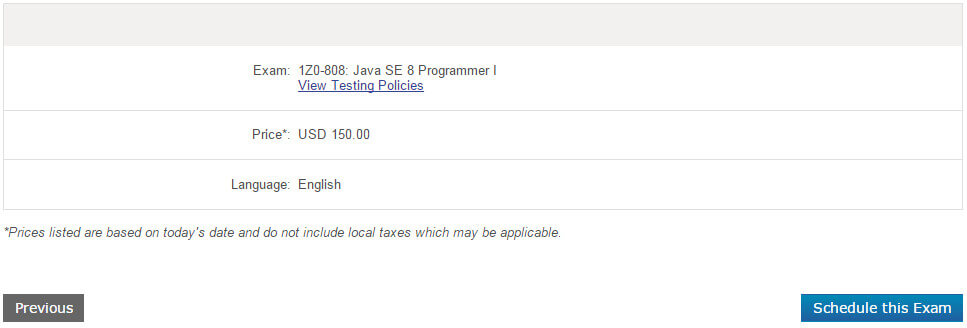
In this window, the name, the price and the language of the selected exam are displayed. Now we can choose the time and the location of the exam. For this, press to “Schedule this Exam” button. “Confirm Exam Selection” window appears and you are asked to confirm the selected exam. After making sure that you have chosen the correct exam, press “Proceed to Scheduling” button to continue.
In this window, the list of the appropriate test centers opens:
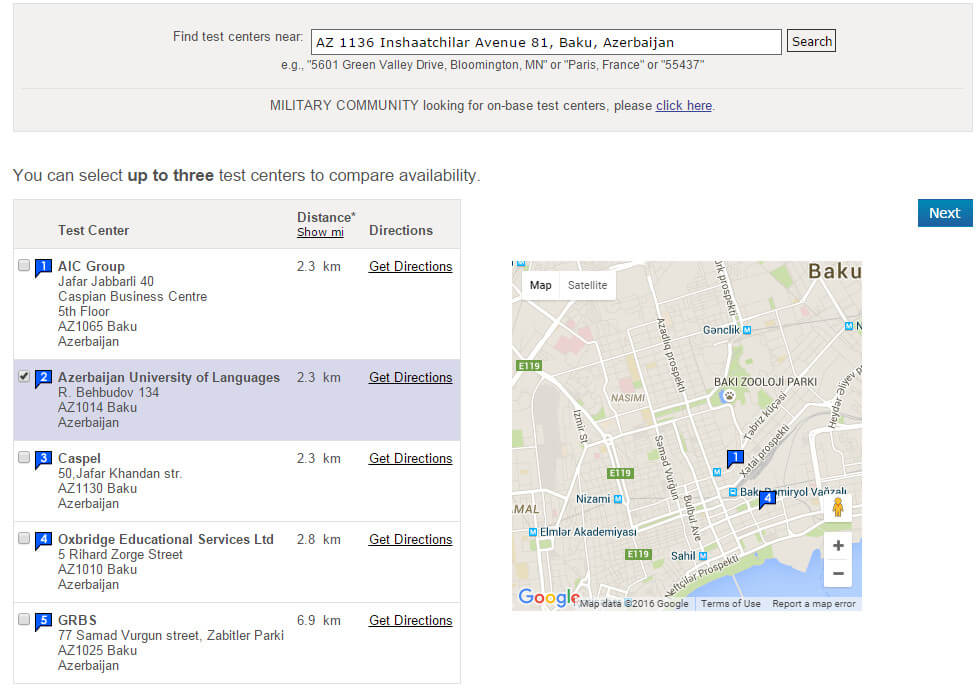 The list of these Test Centers is searched and sorted according to address information we provided in the registration process on the Pearson VUE. The choice of the Test Center is one of the important steps and can have an effect on the exam result considerably. For this reason, when choosing the Test Center, it is necessary to make right choice.
After selecting Test Center, press the “next” button and the exam schedule will be opened:
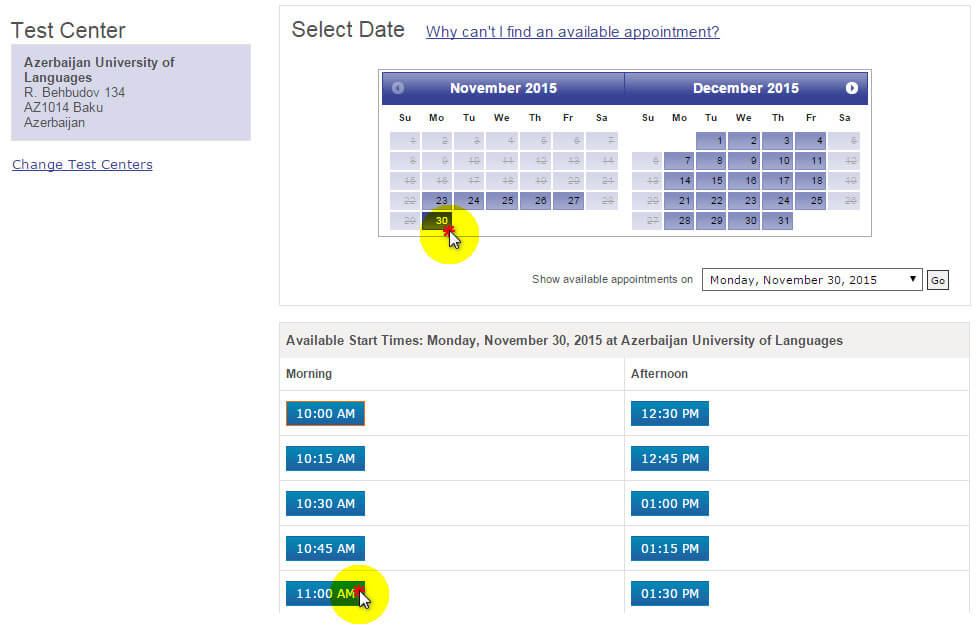
Exam schedules may be different depending on the Test Center. Choose the date and time that you want to take the exam. After that, “My Order” window opens:
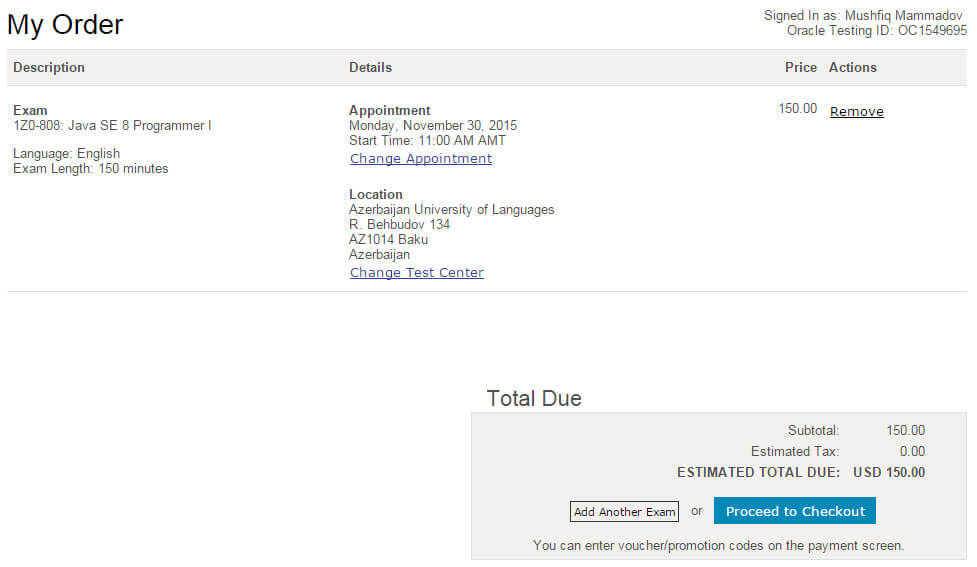 Before going to “Checkout” step, check again whether the included information is correct. In this step, it is possible to change the Exam Schedule and Test Center. After making sure that everything is correct, press the “Proceed to Checkout” button and the following window opens:
The “Checkout” stage consists of 5 steps:
- Step 1. Confirm Personal Information;
- Step 2. Agree to Policies;
- Step 3. Enter Payment;
- Step 4. Submit Order;
- Step 5. Receipt.
In Step 1, review your personal information and press “next”.
In Step 2, the examination rules are displayed and after reading them, confirm and press “next”.
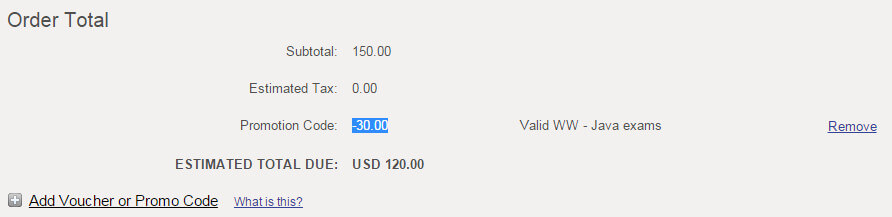
In Step 3, enter your credit card details and address. Before you enter them, you are asked “voucher” or “promo code” :
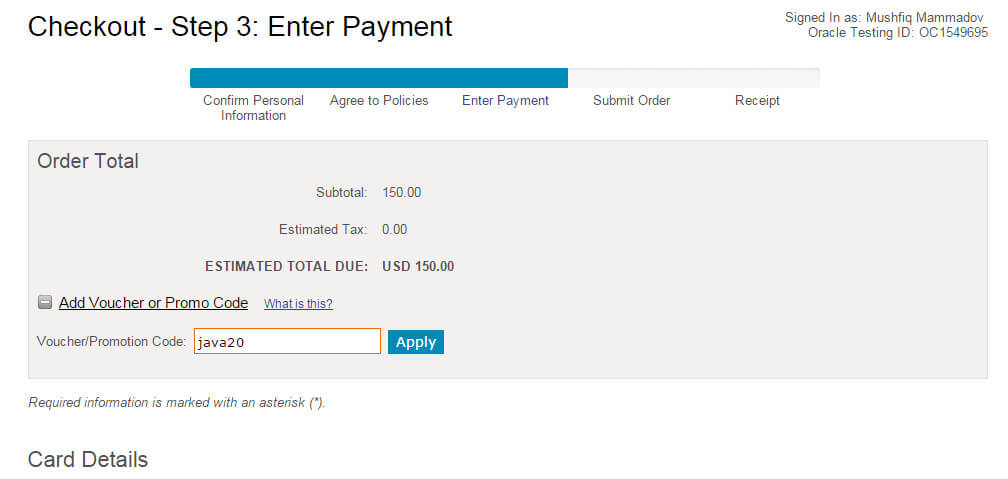 The year when I took the exam coincided with Java’s 20th anniversary and in this regard, Oracle had announced a 20 percent discount campaign for all Java exams. To take advantage of the campaign, I was only required to enter the promo code “java20”. After entering the promo code and pressing the “apply” button, the amount of the charge was reduced to $120 from $150:
 After entering your credit card details and address, press the “next” button and then the “Send Order” window opens. Your order is now ready and waiting for your confirmation. Unless you press “Submit Order” button, your order will not be completed and no amount will be charged from your card. Press “Submit Order” button in order to confirm your order:
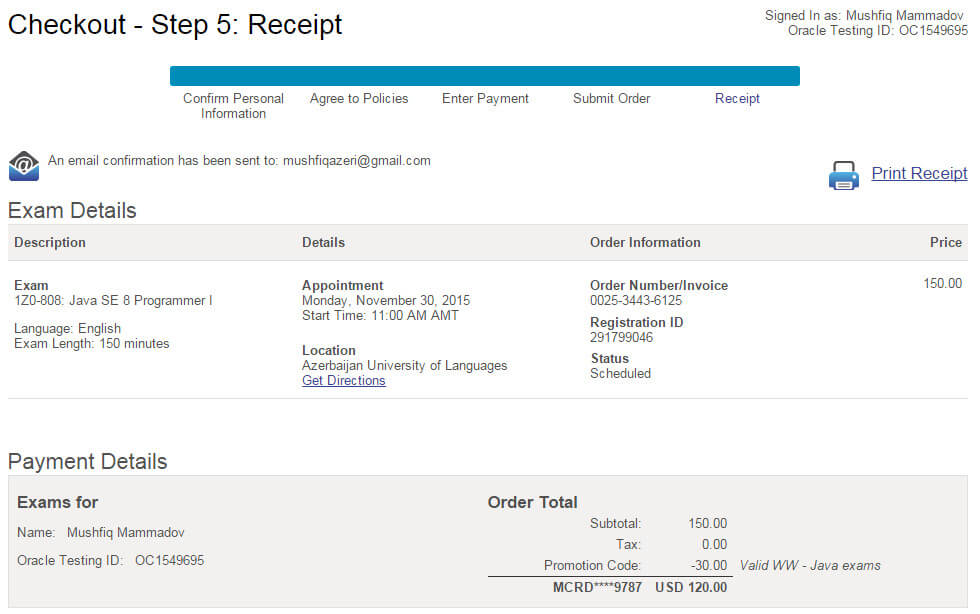
When your order is verified, you will receive an email about it.
You can change the exam date by logging into your account and doing “reschedule” until 24 hours left for the exam. You do not have to pay extra money or penalty on this occasion. However, it is impossible to make any changes if less than 24 hours left for the exam, and your money will not be refunded if you do not attend the exam.
I had created a video (using screen recorder) when I was registering for my exam because I was planning to include the link of video in the “My Certification Notes” mini book. You can watch the video of my registration process by following this link:


